This post may contain affiliate links. It does not cost you anything more, but I may receive a commission from this click.
Having trouble with the alignment on your laser cut projects? Trying to engrave your project, but find it is engraving where it appears to be in the camera? A jig can solve all of these problems for you, speed up the process, and make your prints more accurate and perfectly aligned.
Speed things up with a jig!
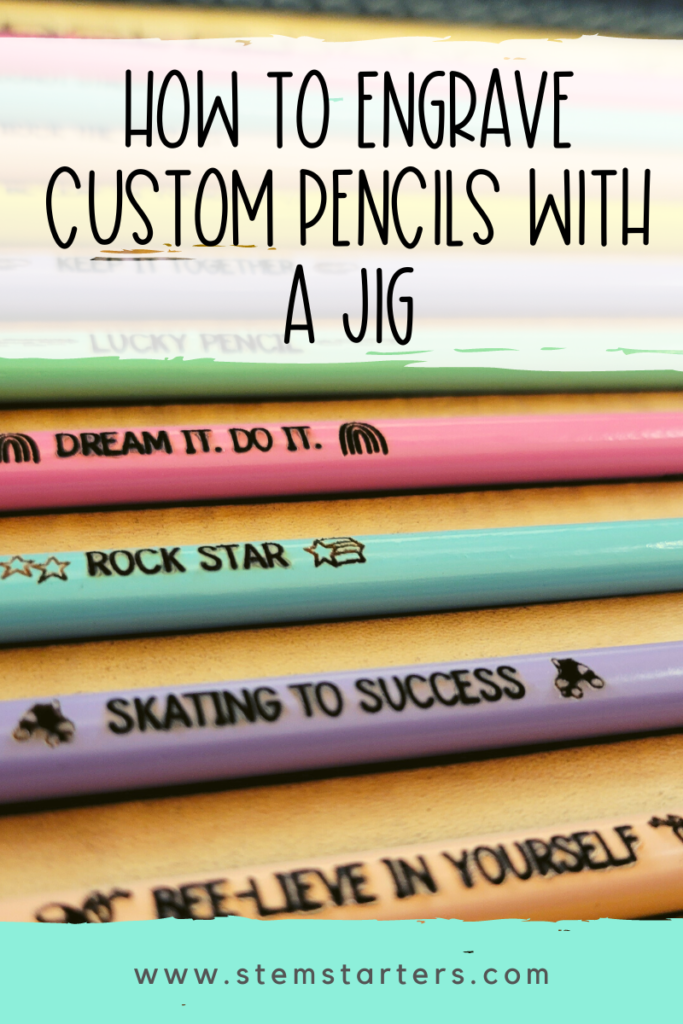
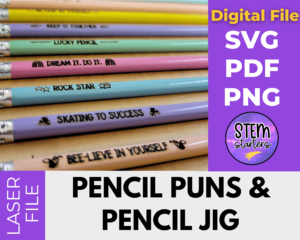
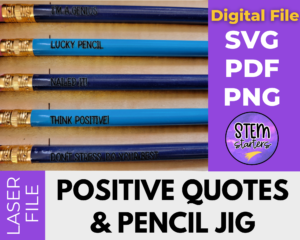
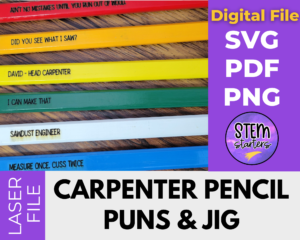
Using this Glowforge/laser cutter jig, you can get started printing your own custom-made pencils today. You can add names to your pencils and give them as gifts, use them to make your own promotional pencils for your business, and write encouraging or punny messages on them to lift people up or just make them laugh.
What is a jig?
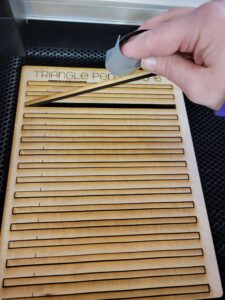
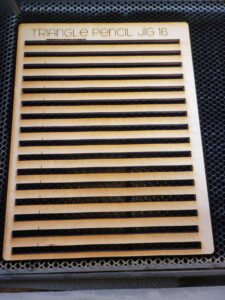
A jig is a tool that you can use in your laser cutter for perfect placement every time. You can cut this out one time from cardboard or scrapwood and then use this placeholder for placing your designs on your design screen and for holding your materials, such as pencils, in place.
Why use a jig?
I wanted to create pencils for all 500 students in my school for the testing season. I used these pencils from Amazon https://amzn.to/3YOUIdF and I love how bright they are and how well the engraving shows up. I wanted to give students a pencil with their own name that would make them feel special and perhaps boost their confidence. I knew that I had to figure out a way to make the process faster if I was going to complete the project in time. I cut out this jig, left it in my machine without moving it, and then was just able to switch out the pencils, change the names in my design space and hit print! Perfect pencils everytime!
Using the Jig
There are two ways you can use your pencil jig. The first way is my preferred method because it is the MOST accurate and will give you absolutely perfect pencils every time.
- Cut out the jig only (red lines) and ignore all others.
- Remove the parts that you just cut out, without moving the jig at all.
Tip: You may want to tape down the sides before you attempt to move the cut pieces. I also use tape rolled up and press down on the pieces so that they come out with the tape and I’m less likely to move the jig.
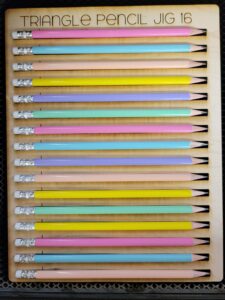
3. Place what you would like to engrave, such as pencils.
4. Place your artwork in the workspace on your computer according to where the design shows it should be placed, even if it looks off on the camera.
5. Engrave/Score your words/pictures and select ignore for the parts of the jig.
You can also use the jig once it has been moved. The words might not come out as perfectly as the first way, but will still be very close.
- Place this jig in the very center of your crumb tray.
- Put your pencils in the jig.
- Center your words on your pencils in the Glowforge software.
- Choose engrave or score on for your words.
- Click on print. Your words will SHIFT, but DON’T move anything. That is just the fisheye of the Glowforge camera. Everything should print perfectly.
If the second method doesn’t work for you, quickly cut out the rectangles each time you need to make pencils and return to the first method.
That’s it! Cute pencils to gift to someone (or yourself!) quickly and perfectly! Check out these amazing products next time you are thinking of creating pencils:
What will you create?
Now it’s your turn! What will you engrave on pencils today? Tell me in the comments!


3 Responses
Thanks.
Thx